
Why Your Tile Adhesive Fails on Large Format Tiles — and How to Fix It for Good
You’ve invested in premium large-format porcelain slabs. You prepped the substrate. But a week after installation, you hear that hollow sound—or worse, you spot a hairline crack. You are not alone. This is one of the most common failures in modern tiling, and it usually comes down to the tile adhesive you chose.
Let’s diagnose the issue and give you the exact fix.
Symptom Checklist
You might notice:
- Hollow spots (drumminess) when tapping the tile, especially in the center.
- Lipperage — tiles that have settled unevenly, creating a sharp edge.
- Cracked tiles — typically a straight line running through the center of a large slab.
- Bond failure — the tile lifts cleanly off the substrate with no mortar stuck to the back.
Root Causes
-
Insufficient Coverage (Most Common) The mechanism: Large format tiles are stiff. If you use a standard floor tile glue with a 6mm notch trowel, the tile will not achieve full contact. Air pockets form. When foot traffic or thermal expansion occurs, the tile flexes and cracks. You need 95% coverage for wet areas, 80% for dry.
-
Incorrect Adhesive Grade Standard cementitious adhesives lack the flexural strength for large slabs. You require a polymer-modified adhesive (classified as C2TE). Without the polymer additive (usually a dry polymer powder like PVA/VAE), the tile bonding mortar cannot absorb differential movement between the concrete slab and the tile.
-
Rapid Skin-Over If you mix too much rapid set tile adhesive at once, or work in direct sunlight, the mortar skins over before the tile is beaten in. The bond fails because the adhesive cannot wet the tile back.
-
Lippage from Non-Slip Installation Issues Tile leveling systems require a non-slip tile installation technique. If the flexible tile adhesive for floors is too stiff or too loose, the clip system will snap, or the tile will sag back down.
Diagnosis
How to confirm which cause applies:
- The Pull Test: After 7 days, try to lift a corner of a tile. If it comes up clean with no mortar on the back, your tile adhesive was too dry or had skinned over.
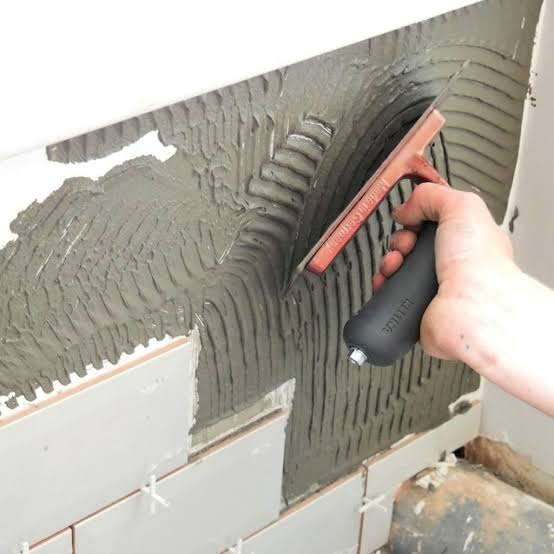
- The Trowel Check: Look at your trowel. If you used a 10mm or 12mm U-notch trowel, that is correct for large format. If you used a 6mm V-notch, you have insufficient mortar depth.
- The Back Butter Test: After beating in the tile, lift it immediately. If the back is only 50% covered, your C2TE tile adhesive was not combed correctly, or you did not back-butter the tile.
Fix
Specific repair steps for each cause:
Fix 1: Coverage Failure (C2TE Application)
- Tools: 12mm x 12mm U-notch trowel (minimum).
- Process: Apply YUNYAN polymer-modified adhesive (C2TE grade) to the substrate. Comb in one direction only. Immediately back-butter the tile with a thin 3mm layer using the flat side of the trowel.
- Ratio: Mix YUNYAN C2TE powder with clean water at a ratio of 3.2 liters of water per 20kg bag (16% by weight). Do not exceed this.
- Thickness: Final mortar thickness under the tile should be 6-8mm. Do not exceed 12mm.
- Curing: Allow 24 hours before grouting. Light foot traffic after 24 hours, heavy traffic after 7 days.
Fix 2: Flexural Failure (Use C2TE S1)
- Product: Use YUNYAN C2TE Tile Adhesive (S1 classification—deformable).
- Application: Apply as above. For cracked substrates, use a decoupling membrane first.
- Thickness: Minimum 5mm bond line.
Fix 3: Rapid Skin-Over (Rapid Set)
- Mix: Only mix as much rapid set tile adhesive as you can use in 15 minutes. Mix using a drill at low speed (400-600 RPM).
- Tool: Use a fresh bucket and clean water. Contaminated water accelerates setting.
- Fix: If the mortar has skinned over (shiny surface), scrape it off and re-comb fresh mortar. Do not wet the skin to reactivate it.
Fix 4: Lippage (Non-Slip Installation)
- Technique: After beating the tile into the fresh tile bonding mortar, insert leveling clips at all corners and every 300mm along the edge.
- Adhesive: Use YUNYAN flexible tile adhesive for floors (C2TE S1) which has a thixotropic consistency—it holds the tile in place without sagging.
- Wait: Do not walk on the floor for 24 hours.
Prevention
To avoid this problem in future projects, follow the “Big Tile Rule”:
- Always use a C2TE adhesive for any tile larger than 60x60cm. For porcelain slabs over 120cm, use YUNYAN C2TE Tile Adhesive (S1).
- Use the right trowel. Minimum 10mm notch for large format tiles.
- Mix correctly. Water to powder ratio is critical. Too much water reduces bond strength by 50%.
For distributors and importers: Stock YUNYAN polymer-modified adhesive products. Our tile adhesive for large format tiles and tile adhesive for bathroom walls are formulated with advanced redispersible polymer powders (VAE) to ensure zero slippage and maximum flexibility. This is the non-slip tile installation solution your crews need.
By using the correct tile bonding mortar from YUNYAN, you eliminate callbacks. It is a cost-effective insurance policy.
Ready to Solve Your Adhesive Problems?
For technical data sheets, samples, or bulk pricing on C2TE tile adhesive, rapid set tile adhesive, and flexible tile adhesive for floors, contact our engineering team.