How to Apply Colored Sand Floor Coating: A Step-by-Step Guide for Contractors
Background
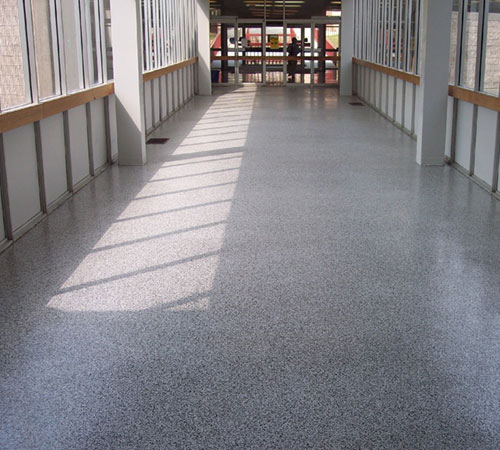
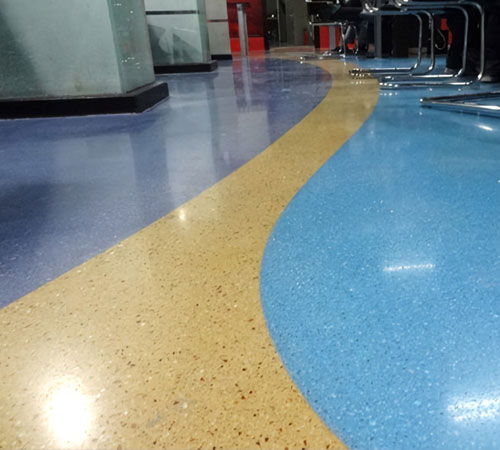
Colored sand floor coating is a high-performance decorative and protective system that combines epoxy or polyurethane resin with colored aggregate. Unlike painted floors that wear thin, this system creates a monolithic, textured surface that bonds mechanically with the substrate. The result is a slip-resistant, durable finish suitable for garages, patios, basements, pool decks, warehouses, and commercial spaces. For contractors, mastering this application means fewer callbacks and higher client satisfaction due to superior colored sand floor coating durability and aesthetic consistency.
Preparation — Tools & Materials Checklist
Tools Required:
- 10–15 mm notched trowel (for broadcast application)
- Heavy-duty roller frame with 18 mm medium-nap rollers (2–3 pieces)
- Mixing paddles and low-speed drill (300–600 RPM)
- Mortar mixer or paddle mixer for aggregate blending
- Plastic squeegee (600 mm width)
- Spike shoes (mandatory for wet application)
- Tape measure, chalk line, utility knife
- Dust mask, nitrile gloves, safety glasses
Materials Required (per 20 m² area):
- 10 kg epoxy primer (solvent-free, low-VOC)
- 25 kg colored sand epoxy floor coating (pre-blended resin + colored aggregate)
- 5–8 kg colored quartz sand (for broadcast or trowel-in application)
- 3–5 kg topcoat sealer (polyurethane or epoxy clear coat)
- 10–15 m of edge masking tape
- Plastic sheeting for adjacent walls
Optional but Recommended:
- Surface profile gauge (to verify CSP-2 to CSP-3 profile)
- Moisture meter (to test slab moisture before application)
Step-by-Step Instructions
Step 1: Substrate Preparation (Critical — 60% of success)
1.1 Diamond grind the concrete slab to achieve a CSP-2 to CSP-3 profile (concrete surface profile). This removes laitance, old coatings, and opens pores for mechanical bond.
1.2 Vacuum thoroughly with a HEPA-filtered vacuum. Blow out cracks and joints with compressed air.
1.3 Repair all cracks wider than 0.5 mm using a flexible epoxy crack filler. Allow 4–6 hours cure time at 20°C.
1.4 Test moisture vapor emission rate (MVER). If MVER exceeds 3 lbs/1,000 ft²/24 hours, apply a moisture vapor barrier primer.
1.5 Apply epoxy primer at 200–250 g/m² using a medium-nap roller. Back-roll to ensure even coverage. Allow 6–8 hours tack-free cure (or per manufacturer specs). The primer is essential for colored sand floor coating for indoor use to prevent outgassing.
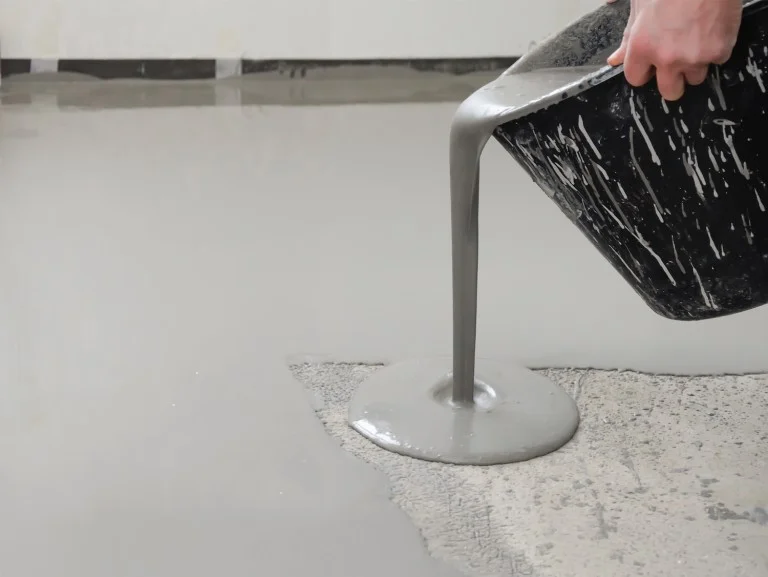
Step 2: Mix and Apply the Colored Sand Epoxy Floor Coating
2.1 Pre-blend the colored sand floor coating resin and hardener according to manufacturer ratio (typically 2:1 or 4:1 by volume). Mix for 3 minutes at low speed, then scrape sides and bottom of pail and mix another 1 minute.
2.2 Add the colored aggregate (quartz sand) into the mixed resin. For a heavy texture, add 8–12 kg aggregate per 10 kg of resin. For a fine texture, add 4–6 kg. Mix for 2 minutes until aggregate is fully wetted.
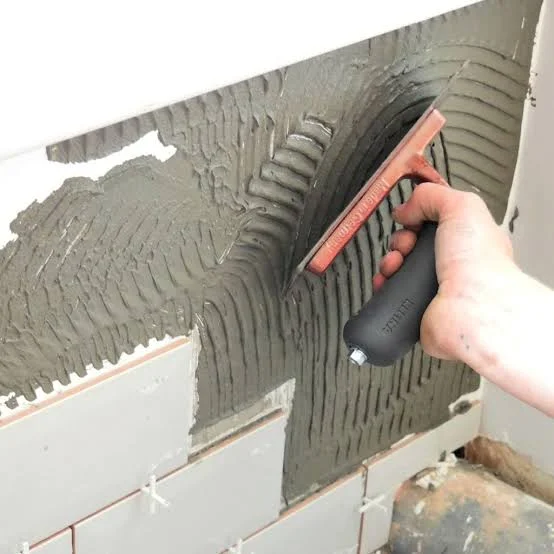
2.3 Pour the colored sand epoxy floor coating onto the primed floor in 1–2 m² sections. Spread with a notched trowel at 3–5 mm thickness. Immediately back-roll with a heavy-duty roller to embed aggregate and level the surface.
2.4 Work in sequential strips, overlapping each pass by 50 mm. For colored sand floor coating for patios or outdoor areas, keep a wet edge to avoid lap lines.
2.5 Allow the textured floor coating to cure for 12–16 hours at 20°C before foot traffic. For colored sand floor coating for commercial spaces, extend cure to 24 hours before light equipment.
Step 3: Apply Topcoat Sealer (Optional but Recommended)
3.1 Lightly sand the cured epoxy sand floor with 120-grit sandpaper on a pole sander to remove dust nibs and open the surface for the sealer.
3.2 Vacuum thoroughly and wipe with a tack cloth.
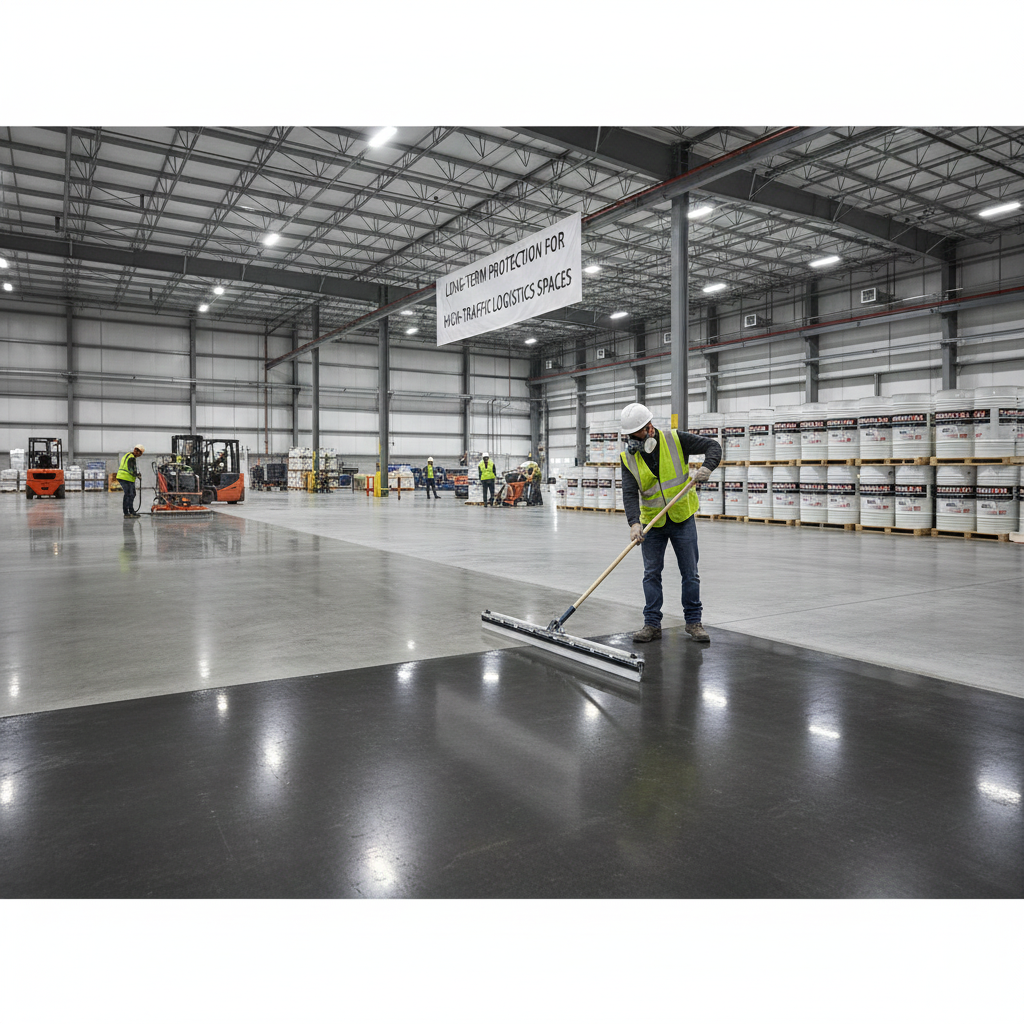
3.3 Apply clear polyurethane or epoxy topcoat at 150–200 g/m² using a fresh medium-nap roller. Back-roll for uniform sheen. This step dramatically improves colored sand floor coating durability and stain resistance.
3.4 Allow 24 hours full cure for light traffic, 72 hours for heavy traffic. For colored sand garage floor coating, consider a second topcoat for maximum chemical resistance.
Step 4: Cure and Maintain
4.1 Maintain ambient temperature between 15–30°C during cure. Do not allow direct sunlight on the coating for the first 48 hours (causes blistering).
4.2 Remove masking tape while the topcoat is still slightly tacky (within 2–4 hours of application).
4.3 For colored sand floor coating for outdoor use, allow 7 days cure before exposure to rain or pool chemicals. The colored sand pool deck coating will achieve full strength after 14 days.
Common Mistakes
Mistake 1: Inadequate Substrate Profile
Error: Grinding too lightly or skipping the grind entirely. Result: Delamination within 6 months — colored sand concrete floor coating peels off in sheets. Fix: Always use a diamond grinder with 30/40-grit metal bonds. Verify profile with a test kit. If you can't feel roughness with your palm, grind deeper.
Mistake 2: Overworking the Wet Edge
Error: Rolling back over partially cured material. Result: Discoloration, roller marks, and inconsistent texture. This is the #1 cause of aesthetic rejections in colored sand floor coating application. Fix: Plan your layout so you can complete each section in one continuous pass. Never re-roll an area that has started to tack (usually after 15–20 minutes at 25°C).
Mistake 3: Wrong Aggregate-to-Resin Ratio
Error: Too much aggregate = brittle, porous coating. Too little = insufficient anti-slip floor finish. Result: Customer complaints about slipperiness or rapid wear in high-traffic zones. Fix: Weigh your components. For a standard decorative floor coating, use 60–70% aggregate by weight of the total mix. For colored sand floor coating for warehouses, increase to 75–80% for maximum impact resistance.
Product Recommendations
For consistent results, consider YUNYAN's pre-blended colored sand floor coating systems. Their colored sand floor coating for indoor use line (SKU: YN-EP200) is formulated with 0% VOC and cures in 12 hours at 20°C. For colored sand floor coating for outdoor use, the polyurethane-based system offers UV stability and thermal cycling resistance down to -20°C. For colored sand floor coating for basements, the YN-EP100 moisture-tolerant primer addresses high humidity conditions. All YUNYAN products are factory-tested for colored sand floor coating durability exceeding 50,000 cycles on the Taber abrasion test.
Need Technical Support?
Visit yunyanchina.com/contact-us for application videos, mixing calculators, and direct technical assistance from YUNYAN's team of flooring specialists. They can also provide colored sand floor coating price quotes for bulk orders.