
How to Choose and Apply Epoxy Primer for Concrete Floors: A Step-by-Step Guide for Contractors
Background
You've prepped the concrete, the substrate is clean, and you're ready to install a high-performance flooring system. But skip the epoxy primer and you're gambling with delamination, bubbling, and callbacks that eat into your margins.
The epoxy primer—also called an epoxy bonding coat—does three critical jobs: it seals porous concrete, bonds the topcoat to the substrate, and blocks moisture vapor from migrating up through the slab. Whether you're specifying a low VOC epoxy primer for commercial flooring or a solvent-free epoxy primer for a sensitive environment, getting this base layer right determines whether your floor lasts five years or fifteen.
This guide walks you through the selection process and application steps, with specific measurements, timing windows, and the mistakes that separate professionals from amateurs.
Preparation: Tools and Materials Checklist
Before you open the first bucket, stage everything. Wet layup windows are tight—you don't want to be hunting for a roller handle while the epoxy bonding coat is kicking.
Tools
- Floor grinder or shot blaster (minimum 20-grit diamond grinding)
- Industrial vacuum with HEPA filter
- Moisture meter and pH test kit
- Squeegee with rubber blade
- 18mm nap rollers (medium pile, solvent-resistant)
- Mixing drill (slow speed, 300–400 RPM) with jiffy mixer blade
- Spiked roller shoes (for broadcast applications)
- Paint tray and buckets
- Tape for masking expansion joints
- Safety gear: respirator (organic vapor cartridges), gloves, safety glasses, coveralls
Materials
- Epoxy primer (calculate at 0.15–0.25 kg/m² depending on porosity)
- Solvent for clean-up (check primer datasheet)
- Crack filler or repair mortar (for damaged slabs)
- Priming sand or aggregate (if you need a textured base)
- Plastic sheeting for moisture-sensitive areas
Surface conditions to verify:
- Concrete moisture: below 75% RH (relative humidity) for solvent-free epoxy primer; below 85% RH for most water-based epoxy primer systems
- Concrete pH: between 7 and 10
- Surface profile: CSP 1–3 (concrete surface profile) for thin film primers
- Ambient temperature: 10–30°C
- Dew point margin: minimum 3°C above dew point
Step-by-Step Instructions
Step 1: Assess the Slab and Repair Damage
Start with a thorough moisture test. Press plastic sheeting to the floor and seal the edges. Wait 24 hours. If condensation appears, you have a moisture problem that no epoxy primer will fix without a moisture vapor barrier system.
For epoxy primer for damp concrete slabs, you'll need to address the moisture source first or use a specialized moisture-tolerant system. YUNYAN can support you with technical guidance on substrate preparation and primer selection for challenging conditions.
Sub-steps:
- Test moisture at three locations per 50 m² using the plastic sheet method or a pin-type moisture meter
- Check pH with a swab test—if pH exceeds 10, acid wash and rinse until neutral
- Fill cracks wider than 0.5mm with a structural repair mortar
- For epoxy primer for cracked concrete repair, chase the cracks with a grinder to create a V-groove, then fill with a 2-component epoxy mortar
Step 2: Grind and Clean the Surface
Mechanical profiling is non-negotiable. Acid etching is not enough for modern epoxy systems.
Sub-steps:
- Grind the entire floor with a 20-grit diamond grinder until the laitance layer is removed and the aggregate becomes visible
- For epoxy primer for polished concrete repair, use a coarser grind (14-grit) to ensure mechanical key
- Vacuum thoroughly, then wipe with a clean, dry mop to remove all dust
- Verify profile: sprinkle water on the floor—if it beads, you need more grinding; if it absorbs within 30 seconds, you're ready
Step 3: Mix and Apply the Epoxy Primer
Read the technical datasheet for your epoxy primer twice before mixing. Mixing ratios vary significantly between solvent-free epoxy primer and water-based epoxy primer systems.
Sub-steps:
- Pre-mix the base component with a drill for 1 minute to redistribute settled pigments
- Add the hardener component and mix for 2–3 minutes, scraping the sides and bottom of the bucket twice
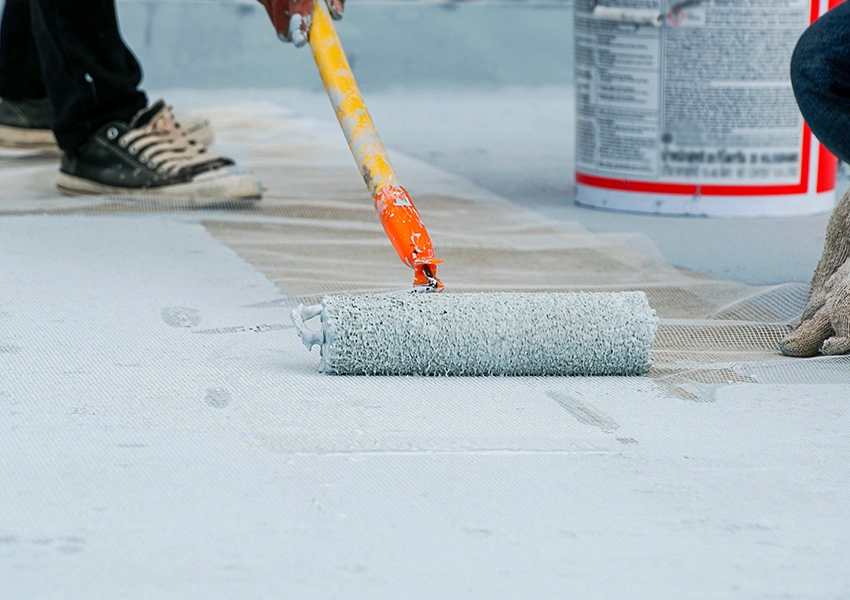
- Pour the mixed floor coating base coat onto the floor in a zigzag pattern
- Spread with a squeegee, then back-roll with a 18mm nap roller for uniform coverage
- Work in sections that you can complete within the pot life (typically 30–45 minutes for solvent-free systems)
- Apply at the specified rate—usually 0.15–0.25 kg/m² for a primer coat. More on porous slabs, less on dense concrete
Step 4: Manage the Recoat Window
This is where most callbacks happen. The epoxy primer for concrete floors must dry to the right state before you apply the topcoat.
Sub-steps:
- Touch test: press your gloved finger into the primer. If it's tacky but doesn't transfer to your glove, you're in the recoat window
- Most systems require topcoating within 24 hours. If you exceed the maximum recoat time (usually 48 hours), you must sand the primer to create a mechanical key
- For epoxy primer for high traffic warehouse floors, consider a double-priming approach: first coat at 0.20 kg/m², allow to dry, then apply a thin second coat at 0.10 kg/m² to build a stronger base
- If using a metallic epoxy primer as part of a decorative system, maintain uniform thickness—variations show through metallic topcoats
Step 5: Handle Special Conditions
Different substrates require adjustments.
For exterior patios: Use a water-based epoxy primer or a UV-stable system. Solvent-free primers can blush when exposed to sunlight before topcoating. For epoxy primer for exterior concrete patios, always check the dew point margin and avoid application in direct sunlight.
For tile over concrete preparation: The epoxy primer acts as a bonding agent between the concrete and thinset. Apply at a heavier rate (0.25 kg/m²) and broadcast silica sand into the wet primer to create a mechanical key for the tile adhesive.
For metal surfaces in construction: Use a specialized epoxy primer for metal surfaces in construction with corrosion inhibitors. This is a different formulation from concrete primers—check the product datasheet before substituting.
Common Mistakes and How to Avoid Them
Mistake 1: Applying Primer to a Damp Slab
You're in a hurry, the slab looks dry, but moisture vapor is actively migrating. Install the primer and it will blister or delaminate within weeks.
Solution: Always run moisture tests, even if the slab "looks dry." For epoxy primer moisture barrier for concrete applications, use a moisture-tolerant system or install a vapor barrier first. YUNYAN can advise on suitable primer systems for damp concrete if you provide your slab's moisture readings.
Mistake 2: Skipping the Grind
You acid-etched the floor and it looks clean. But acid etching leaves a weak surface layer that the primer can't grip.
Solution: Mechanical profiling with a diamond grinder is required for any serious epoxy bonding coat application. The profile you create is what carries the load. A CSP of 1–3 is the minimum for thin-film primers.
Mistake 3: Missing the Recoat Window
You primed on Friday and return Monday to topcoat. The primer has fully cured, and the topcoat is now sitting on a glass-smooth surface with no mechanical grip.
Solution: Plan your work to stay within the recoat window. If you can't topcoat within the specified time, sand the primer to a dull finish with 80-grit paper, vacuum, and proceed. This adds an hour of labor but saves you from a failed installation.
Mistake 4: Underestimating Consumption
Porous concrete drinks primer like a sponge. You budgeted 0.15 kg/m² but the slab is taking 0.30 kg/m².
Solution: On suspect slabs, prime a small test area first. Measure consumption before committing to the full install. For those looking to understand the difference between epoxy primer vs concrete sealer, remember: a sealer sits on top, a primer penetrates and bonds. They are not interchangeable.
The Contractor's Selection Checklist
Before you specify or purchase an epoxy primer, run through this checklist:
- Substrate type: Concrete, repair mortar, or metal? Different substrates require different primers
- Moisture condition: Below 75% RH for solvent-free, below 85% RH for water-based
- Exposure: Interior or exterior? UV exposure affects primer selection
- Topcoat compatibility: Is the primer compatible with your chosen topcoat system?
- Traffic level: High-traffic areas may need a double-primed base
- Regulatory requirements: Does the project specify low VOC? Consider a low VOC epoxy primer for commercial flooring
- Recoat timing: Can you schedule the topcoat within the recoat window?
- Warranty requirements: Some system warranties are void if the wrong primer is used
When to Choose Different Primer Types
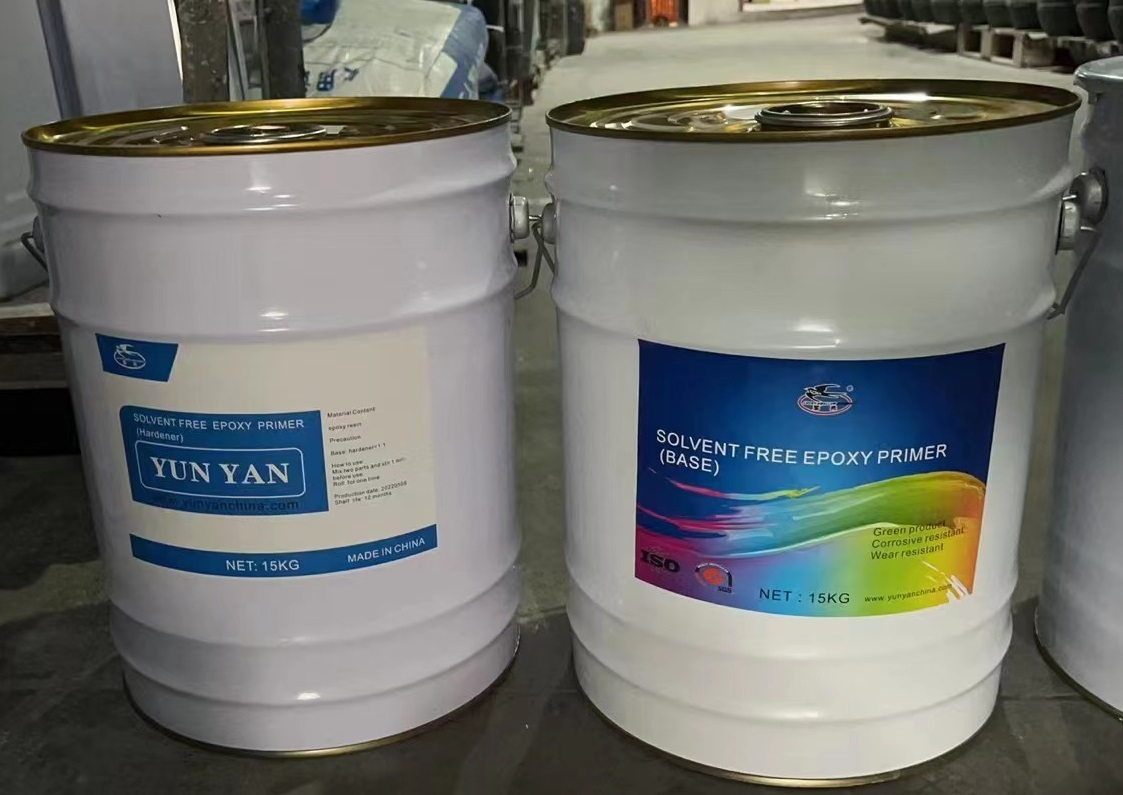
Solvent-Free Epoxy Primer
Best for: High-build applications, epoxy primer for industrial flooring systems, and environments where solvent fumes are a concern. These primers have 100% solids content, meaning no VOC emissions during cure.
Trade-off: Higher viscosity means more effort to apply. You'll need a squeegee plus back-roll technique.
Water-Based Epoxy Primer
Best for: Epoxy primer for sustainable flooring systems, projects with strict VOC limits, and epoxy primer for tile over concrete preparation where you need a low-odor option.
Trade-off: Lower solids content means more coats may be needed for the same build. Water-based primers are also more sensitive to application temperature.
Fast-Cure Primers
Best for: Epoxy primer for garage floor renovation where you need to return the space to service quickly. Fast-cure formulations can be topcoated in 4–6 hours.
Trade-off: Shorter pot life means smaller batch sizes and faster work pace.
How YUNYAN Supports Your Flooring Projects
YUNYAN's Floor Decoration Materials range includes epoxy primer systems suitable for a variety of applications. As an epoxy primer OEM supplier for distributors, YUNYAN can supply primers in custom packaging with your branding, tailored to your regional market's technical requirements.
For epoxy primer for high traffic warehouse floors, YUNYAN can recommend primer systems with appropriate build and abrasion resistance. For distributors servicing multiple markets, YUNYAN's export experience means documentation, packaging, and compliance paperwork are handled correctly the first time.
Architects and specifiers can request technical datasheets, application guides, and sample panels to verify performance before specifying. YUNYAN's technical team can also provide guidance on system compatibility—helping you match the right epoxy primer with the correct topcoat for your project conditions.
Product Recommendations
For most concrete floor applications, start with a solvent-free epoxy primer for maximum bond strength and moisture resistance. If your project has strict VOC requirements, specify a water-based epoxy primer instead.
For epoxy primer for polished concrete repair, use a low-viscosity primer that penetrates cracked or porous areas before applying the repair mortar.
For epoxy primer for damp concrete slabs, consult with YUNYAN's technical team—they can advise on moisture-tolerant systems or vapor barrier strategies.
For epoxy primer for metal surfaces in construction, request the specific metal primer formulation and confirm corrosion resistance testing is documented.
Get Technical Support
Every slab is different. If you're facing moisture issues, unusual substrates, or demanding performance requirements, get technical support before you start.
Contact YUNYAN's technical team with your project details: substrate condition, moisture readings, temperature range, and traffic expectations. They'll help you select the right epoxy primer system and provide application guidance specific to your conditions.