How to Apply PU Top Coat for Concrete Floors: A Step-by-Step Guide for Contractors
Background
Polyurethane (PU) top coat is the final layer that transforms a functional concrete floor into a durable, high-performance surface. Whether you're working on a garage, gym, commercial space, or industrial facility, a PU top coat provides superior abrasion resistance, chemical protection, and a professional finish that clients expect. Unlike basic sealers, a polyurethane sealer bonds chemically with the underlying epoxy or concrete, creating a monolithic surface that withstands heavy foot traffic, equipment loads, and daily wear. This guide covers the complete PU top coat application guide for contractors who need consistent, repeatable results.
Preparation
Tools Checklist
- Low-nap roller (9 mm or 3/8 inch) – 2 units for large areas
- Squeegee with rubber blade – 1 unit
- Paint tray with liner – 2 units
- Mixing paddle and drill – 1 set
- Stiff-bristle broom – 1 unit
- Wet vacuum – 1 unit (industrial grade)
- Tape measure and chalk line – 1 each
- Protective gear: nitrile gloves, safety glasses, respirator with organic vapor cartridge
Materials Checklist
- PU top coat (aliphatic polyurethane, two-component) – 1 gallon covers approximately 40–50 m² (430–540 ft²) at recommended thickness
- Polyurethane sealer primer (if specified by manufacturer) – 1 gallon per 50 m²
- Solvent for thinning (xylene or manufacturer-recommended) – 1 liter per 5 gallons of coating
- Mixing buckets (clean, 5-gallon) – 2 units
- Painter's tape – 2 rolls
- Drop cloths – 3 units
- Abrasive pads (120–180 grit) – 5 pads
Step-by-Step Instructions
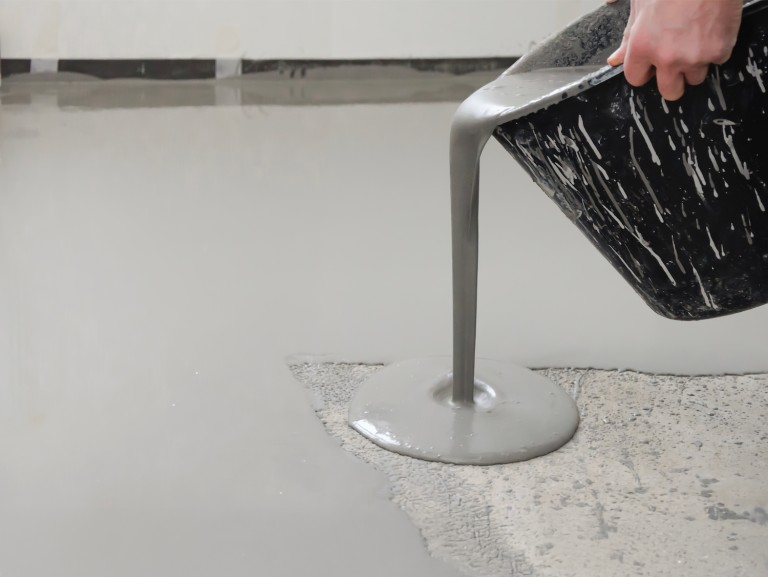
Step 1: Surface Preparation and Priming
Time estimate: 2–4 hours for a 100 m² area
- Inspect the substrate: Ensure the concrete or epoxy base is fully cured (minimum 7 days for concrete, 24–48 hours for epoxy). Test for moisture using a plastic sheet method – no condensation after 24 hours.
- Clean thoroughly: Sweep with stiff-bristle broom, then wet vacuum to remove all dust. For oily areas, degrease with trisodium phosphate (TSP) solution and rinse.
- Mechanical abrasion: Lightly scuff the existing surface with 120-grit abrasive pads. This creates a mechanical bond for the PU top coat for concrete floors. Vacuum again.
- Apply primer (if required): Mix the polyurethane sealer primer according to manufacturer ratios. Roll on in thin, even coats. Allow to dry for 4–6 hours at 20°C (68°F). Primer improves adhesion and prevents outgassing.
Step 2: Mix and Prepare the PU Top Coat
Time estimate: 30 minutes
- Check temperature and humidity: Ideal conditions are 15–25°C (59–77°F) with relative humidity below 75%. Cold temperatures slow cure; high humidity can cause blushing.
- Mix component A (resin) and component B (hardener): Pour entire contents of both containers into a clean bucket. Use a mixing paddle at low speed (400–600 RPM) for 3 minutes until uniform. Do not overmix – air bubbles reduce finish quality.
- Pot life awareness: Two-component PU top coat has a pot life of 30–60 minutes at 20°C. Mix only what you can apply in that window. For large jobs, batch in 2–3 smaller mixes.
- Thin if needed: Add 5–10% manufacturer-recommended solvent if viscosity is too high for application. Test on a small area first.
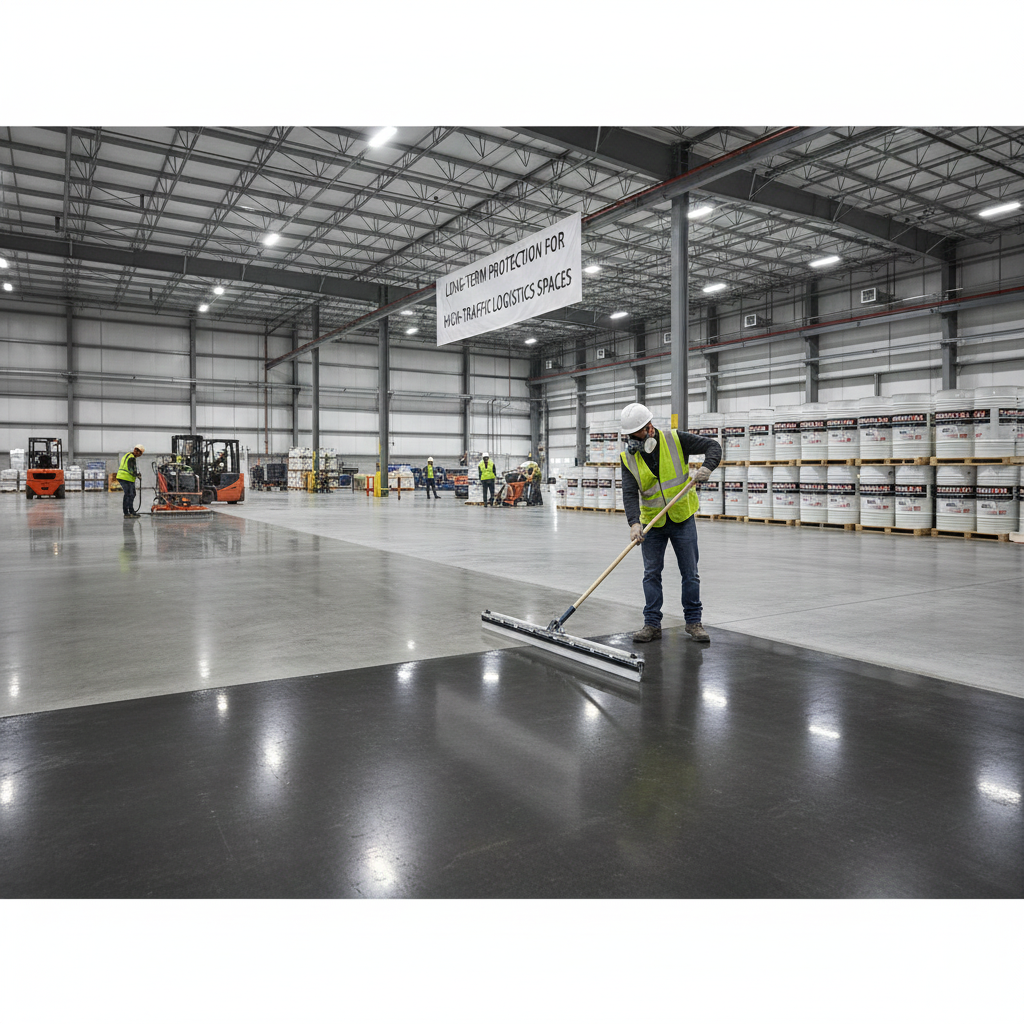
Step 3: Apply the Floor Top Coat
Time estimate: 1–2 hours for 100 m²
- Cut in edges: Using a small brush or roller, apply the PU floor finish along walls, corners, and expansion joints. This prevents lap marks.
- Roll in sections: Pour mixed PU top coat onto the floor in a 1–2 meter wide strip. Use a roller to spread evenly in a W pattern, then back-roll perpendicular to ensure uniform thickness. Maintain a wet edge to avoid lap lines.
- Thickness control: Apply at 0.2–0.3 mm wet film thickness (approximately 8–12 mils). A thicker coat may crack; too thin reduces abrasion resistance.
- Second coat (optional for high-traffic areas): For commercial PU top coat flooring applications, apply a second coat after 12–24 hours. Lightly scuff the first coat with 180-grit pad before recoating.
Step 4: Achieve Desired Sheen and Finish
Time estimate: 15 minutes per coat (application only)
- For high gloss: Use a high gloss floor sealer formulation. Apply in thin, even layers. A high gloss PU top coat requires careful back-rolling to eliminate stippling.
- For matte finish: Choose a matte PU top coat flooring product. Apply same technique but with slightly heavier coat (0.3 mm). Matte finishes hide surface imperfections better.
- Texture options: For slip-resistant industrial PU top coat flooring, broadcast fine silica sand (60–80 mesh) into the wet coat at 0.5–1 kg/m². Apply a second coat to lock in the aggregate.
Step 5: Curing and Protection
Time estimate: 24–72 hours for full cure
- Initial cure: Keep traffic off for 24 hours. Maintain temperature above 15°C (59°F). Avoid water contact for 48 hours.
- Full cure: Heavy loads (forklifts, gym equipment) can be introduced after 72 hours at 20°C. Chemical resistance develops fully after 7 days.
- Final inspection: Check for fish eyes, bubbles, or delamination. Small defects can be sanded and spot-repaired with additional PU top coat.
Common Mistakes
Mistake 1: Skipping Mechanical Abrasion
Applying PU top coat for epoxy floors over a glossy epoxy surface without scuffing leads to poor adhesion. The coating will peel within weeks. Avoid by always abrading with 120–180 grit pads, then vacuuming thoroughly.
Mistake 2: Applying Too Thick
A single thick coat (over 0.5 mm) traps solvent, causing bubbles, blisters, and extended cure time. Avoid by applying two thin coats instead of one thick one. Measure wet film thickness with a gauge.
Mistake 3: Ignoring Environmental Conditions
Applying PU top coat in high humidity (>75%) or low temperature (<10°C) causes blushing (cloudy film) and poor cure. Avoid by checking weather forecasts and using heaters/dehumidifiers in enclosed spaces. Allow 24 hours for temperature stabilization.
Product Recommendations
For consistent results, YUNYAN offers a complete line of floor decoration materials including PU top coat systems designed for concrete, epoxy, and polyaspartic bases. Our abrasion resistant coating formulations provide up to 3x longer service life compared to standard urethanes. The PU floor top coat price remains competitive for bulk orders, with technical datasheets available for all industrial PU top coat flooring and PU top coat for garage floors variants. For gym flooring, our PU top coat for gym floors meets ASTM D2047 slip resistance standards with a matte PU top coat flooring finish that reduces glare.
Technical Support
For detailed PU top coat application guide assistance, custom color matching, or bulk pricing on PU top coat for concrete floors, contact our engineering team. We provide free consultation for project specifications, including high gloss PU top coat and commercial PU top coat flooring systems. Visit yunyanchina.com/contact-us for technical support.