
How to Apply Epoxy Floor Coating on Concrete: A Step-by-Step Guide for Contractors and Industrial Project Managers
Background — What We're Doing and Why
Concrete floors in industrial environments take constant abuse—forklift traffic, chemical spills, heavy equipment loads, and thermal cycling. Left unprotected, concrete dusts, stains, and cracks, creating safety hazards and costly downtime. An epoxy floor coating solves these problems by creating a seamless, high-strength surface that bonds chemically to the substrate. Whether you're specifying a garage floor epoxy for a workshop or a full epoxy flooring system for a 10,000 sq ft warehouse flooring project, the application process determines whether that floor lasts 3 years or 15. This guide covers the critical steps from substrate evaluation to final epoxy top coat application, with measurements and timing you can take to the job site.
Preparation — Tools + Materials Checklist
Tools Required
- Diamond grinding machine (with 30-40 grit metal-bond diamonds)
- Heavy-duty industrial vacuum (HEPA filter recommended)
- Moisture meter (concrete-specific, pin-type or relative humidity probe)
- Low-speed drill with mixing paddle (300-600 RPM)
- Notched squeegee (6 mm notch depth for primer, 10 mm for base coat)
- Spike roller (18-24 inch width, with 19 mm spikes)
- Roller frame with 3/8-inch nap phenolic core rollers
- Paint brushes (2-inch and 4-inch for edges)
- Thermometer and infrared surface temperature gun
- Tape measure, chalk line, painter's tape
Materials Required (per 1,000 sq ft)
| Material | Quantity | Notes |
|---|---|---|
| Epoxy primer (solvent-free) | 4-5 gallons | 8-10 mils wet film thickness |
| Self-leveling epoxy base coat | 10-12 gallons | 1/8-1/4 inch thickness |
| Epoxy top coat | 4-5 gallons | 12-15 mils wet film thickness |
| Anti-slip aggregate (if specified) | 5-10 lbs | Aluminum oxide or silica sand, 60-80 grit |
| Cleaner/degreaser | 1 gallon | Industrial-grade, water-based |
| Crack repair compound | As needed | Low-viscosity epoxy injection |
| Mixing buckets | 4-6 | 5-gallon, clean, dry |
Site Conditions to Verify
- Concrete age: minimum 28 days cure
- Moisture vapor emission rate (MVER): below 3 lbs per 1,000 sq ft per 24 hours (ASTM F1869)
- Surface temperature: 50-85°F (10-30°C)
- Air temperature: stable within 5°F of surface temperature
- Relative humidity: below 75%
- Dew point: surface temperature at least 5°F above dew point
Step-by-Step Instructions
Step 1: Substrate Preparation — The Make-or-Break Step
1.1 Test concrete moisture. Place a 4 ft x 4 ft polyethylene sheet taped on all four edges. Leave for 72 hours. If condensation forms under the plastic, or if the concrete darkens, the slab has excess moisture—you need a moisture vapor barrier primer or a low VOC epoxy floor coating for commercial kitchens that handles vapor transmission.
1.2 Profile the surface. Using the diamond grinder, pass over the entire floor in overlapping passes until you achieve a surface profile (CSP) of 2-3 (concrete surface profile per ICRI Guideline No. 310.2). You should see exposed aggregate with no closed pores. This takes approximately 1-2 hours per 1,000 sq ft.
1.3 Vacuum thoroughly. Use the industrial vacuum to remove all dust. Then vacuum again. Any remaining dust will create adhesion failure—this is the single most common cause of epoxy floor coating delamination.
1.4 Repair cracks and spalls. For hairline cracks (below 1/8 inch), route them into a V-groove and fill with low-viscosity epoxy injection. For larger spalls (over 1/4 inch deep), use an epoxy mortar patch. Allow repairs to cure per manufacturer specs, typically 12-24 hours.
1.5 Apply painter's tape to walls, drains, and expansion joints that will remain uncoated.
Step 2: Prime the Concrete Surface
2.1 Mix the epoxy primer according to manufacturer ratios. For YUNYAN's 3D Epoxy Resin for River Table and Floor Coating (suitable for both decorative and industrial floors), mix resin and hardener for 3 minutes at 300-400 RPM until uniform color and no streaks remain.
2.2 Apply primer using a notched squeegee, working in sections no larger than 100 sq ft. Immediately back-roll with a 3/8-inch roller to ensure even coverage. Target wet film thickness of 8-10 mils.
2.3 Broadcast clean, dry silica sand (20-40 mesh) into the wet primer at a rate of 1-2 lbs per 100 sq ft. This creates a mechanical bond for the next coat. Allow to cure for 12-16 hours at 70°F—longer if cooler. The primer must be tack-free but not fully hard.
2.4 After cure, vacuum loose sand. If any areas feel smooth or glossy, scuff them with 80-grit sandpaper before proceeding.
Step 3: Apply Self-Leveling Epoxy Base Coat
3.1 Check primer cure. The primer should be hard enough that your thumbnail doesn't dent it, but slightly tacky to the touch. If fully cured beyond 24 hours, you must scuff the surface to ensure intercoat adhesion.
3.2 Mix the self-leveling epoxy in 2-gallon batches (not full 5-gallon—working time is typically 20-30 minutes at 70°F). Pour in a ribbon pattern across the section, approximately 2 feet apart.
3.3 Spread with the notched squeegee (10 mm notch) to achieve 1/8-inch thickness. Immediately spike-roll in two directions (north-south, then east-west) to release air bubbles. The epoxy flooring system will self-level within 5-10 minutes.
3.4 Work in sections of 200-300 sq ft. Maintain a wet edge—do not let the edge dry before you pour the adjacent section. This requires a 2-3 person crew: one mixing, one pouring and spreading, one spike-rolling.
3.5 Allow base coat to cure for 24 hours minimum at 70°F. Do not walk on the floor for 12 hours, and do not drive on it for 48 hours. For warehouse flooring with heavy traffic, extend cure to 72 hours before loading.
Step 4: Apply Epoxy Top Coat (With or Without Anti-Slip)
4.1 Lightly scuff the cured base coat with 120-grit sandpaper. Vacuum thoroughly. Wipe with a tack cloth if dust is visible.
4.2 Mix the epoxy top coat per manufacturer instructions. For a garage floor epoxy in a workshop, consider adding 60-80 grit aluminum oxide at 2-5% by weight for slip resistance. For epoxy floor coating for food processing plants, use a food-grade anti-slip aggregate.
4.3 Apply top coat using a 3/8-inch roller in a "W" pattern, then back-roll perpendicular for even coverage. Target 12-15 mils wet film thickness. For high-traffic areas, apply two coats of top coat, allowing 12-16 hours between coats.
4.4 If you need a high-gloss seamless epoxy floor coating for showrooms, apply the top coat in a clean room environment—no dust, controlled humidity, and filtered air intake. Use a lint-free roller cover.
4.5 Allow final cure: light foot traffic at 24 hours, full traffic at 72 hours, chemical resistance at 7 days (at 70°F). For epoxy floor coating application temperature requirements, note that cure time doubles for every 15°F below 70°F.
Common Mistakes — 3 Frequent Errors and How to Avoid Them
Mistake #1: Skipping or Rushing Moisture Testing
The problem: You apply epoxy floor coating over a slab with high MVER—within weeks, blisters form as moisture pressure pushes through the coating. How to avoid: Always perform the polyethylene sheet test (ASTM D4263) or use a calcium chloride test kit (ASTM F1869). If readings exceed 3 lbs/1,000 sq ft/24 hours, specify a moisture-tolerant epoxy primer or install a vapor barrier system before coating. For best epoxy floor coating for high traffic areas in basements or ground-level slabs, moisture testing is non-negotiable.
Mistake #2: Applying Epoxy Outside Temperature Windows
The problem: You apply self-leveling epoxy when the concrete is 45°F but the air is 60°F. The coating cures slowly, stays soft, traps dust, and may never reach full hardness. How to avoid: Measure both surface and air temperature. Surface must be between 50°F and 85°F (10°C-30°C). If the slab is cold, use space heaters to warm it for 24 hours before application. If hot (above 85°F), work in early morning and reduce batch sizes to prevent flash curing. For how to apply epoxy floor coating on concrete in cold weather, use a winter-grade hardener formulation.
Mistake #3: Inadequate Mixing or Over-Mixing
The problem: You mix at high speed (over 600 RPM) and introduce excessive air bubbles. Or you under-mix and leave streaks of unmixed hardener that never cure (fish eyes, soft spots). How to avoid: Use a low-speed drill (300-400 RPM) with a Jiffy-style mixing paddle. Mix for 3 minutes, scrape the sides and bottom of the bucket, then mix for another 2 minutes. For solvent-free epoxy formulations, follow the mixing time exactly—these systems are more sensitive to ratio errors. Always mix in a clean bucket, never reuse a bucket with cured epoxy residue.
Buyer/Contractor Checklist for Epoxy Floor Coating Selection
Before you purchase materials for your next epoxy floor coating project, run through this checklist:
- Traffic type: Light pedestrian (showroom) → standard epoxy floor coating for industrial warehouses or heavy forklift (warehouse) → reinforced epoxy with quartz aggregate
- Chemical exposure: None → standard epoxy. Oils/grease → solvent-resistant epoxy top coat. Food acids → low VOC epoxy floor coating for commercial kitchens
- Slip resistance required? Add anti-slip aggregate (60-80 grit) to the epoxy top coat
- Moisture risk? Test slab. If MVER > 3 lbs, use moisture-tolerant primer or specify a seamless epoxy floor coating for showrooms with vapor barrier
- Temperature range: Application environment between 50-85°F? If not, plan for temperature conditioning
- Budget: Epoxy floor coating cost per square foot ranges $3-12 installed. Higher cost often means thicker film, better chemical resistance, or decorative finish
- Cure time available: Can the facility be down for 72 hours? If not, consider fast-cure epoxy or epoxy floor coating vs polyurethane comparison (polyurea cures faster but costs more)
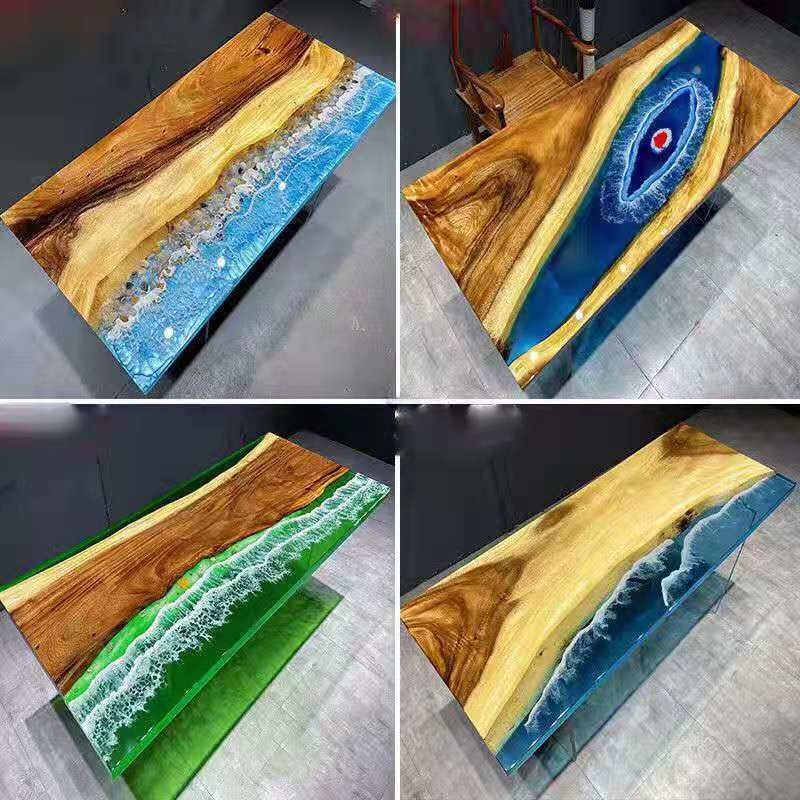
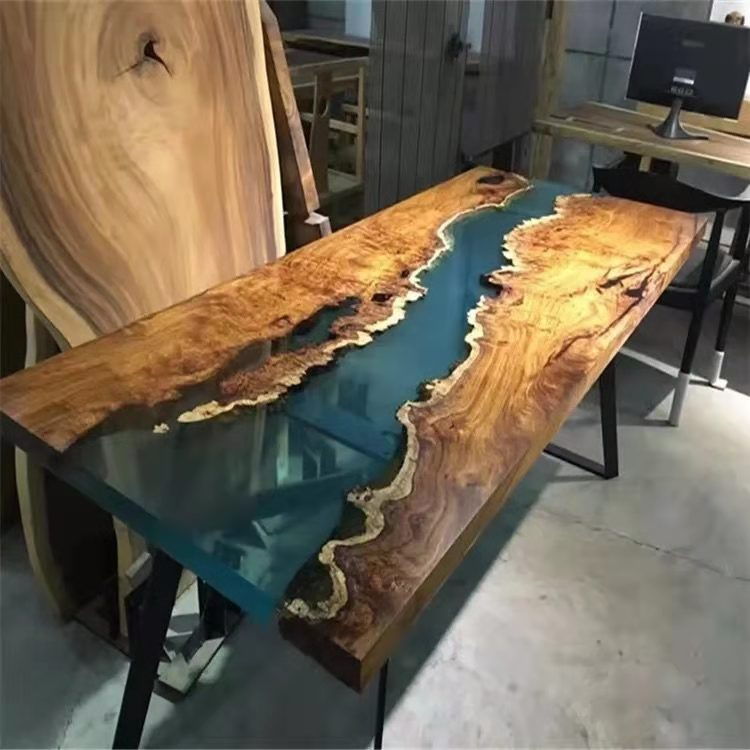
- Color/Finish: Solid color, metallic, or 3D epoxy floor? For river table finishes on decorative floors, use YUNYAN's 3D Epoxy Resin for deep gloss and clarity
- Compliance: Does the project need epoxy floor coating for sustainable construction credits (low VOC, low odor)?
- Bulk ordering: Where to buy epoxy floor coating in bulk — direct from manufacturer for better pricing and consistent batch quality
Use Cases — Where This System Delivers
Use Case 1: Automotive Garage Workshop
A 1,200 sq ft garage floor needed to withstand hot tire pickup, oil drips, and dropped tools. Using a garage floor epoxy system with a solvent-free primer, self-leveling base coat at 1/8 inch, and two coats of epoxy top coat with aluminum oxide anti-slip, the floor survived daily abuse for 5+ years. The durable epoxy floor coating for garage workshops withstood 6,000 lb vehicle lifts without cracking.
Use Case 2: Food Processing Plant Floor
A 5,000 sq ft commercial kitchen required a low VOC epoxy floor coating for commercial kitchens that met USDA standards. The epoxy flooring system included a moisture-tolerant primer (concrete was 4 lbs MVER), a thick self-leveling base coat (1/4 inch), and a high-build epoxy top coat with 80-grit silica sand for slip resistance. The seamless surface eliminated bacterial harborage points and was steam-cleanable.
Use Case 3: Automotive Showroom
For a 2,500 sq ft luxury car showroom, the client wanted a high-gloss, seamless finish with a metallic effect. YUNYAN's 3D Epoxy Resin for River Table and Floor Coating was used as the top coat—its clarity and depth created a "wet look" that reflected showroom lighting. The seamless epoxy floor coating for showrooms required no expansion joints, creating a continuous surface that highlighted the vehicles.
Product Recommendations
For your next epoxy floor coating installation, YUNYAN can support your project with the 3D Epoxy Resin for River Table and Floor Coating (USD 138), which works as both a decorative top coat and a heavy-duty epoxy flooring system component. This product is suitable for industrial floor coating applications when applied at proper thickness, and it meets the clarity requirements for river table finishes on decorative floors.
YUNYAN offers:
- OEM/private label options for distributors
- Technical guidance on epoxy floor coating application temperature requirements
- Sample support for pre-project testing
- Packaging flexibility (bulk drums for large warehouse flooring projects)
- Export support for international contractors
For projects requiring epoxy floor coating for sustainable construction certifications, YUNYAN can provide VOC data and compliance documentation.
Need Technical Support?
For project-specific consultation, technical data sheets, or pricing on bulk orders of epoxy floor coating, contact YUNYAN's technical team: https://www.yunyanchina.com/contact-us
They can help you select the right epoxy flooring system for your traffic level, substrate condition, and cure time requirements—including epoxy floor coating for food processing plants, anti-slip texture formulations, and epoxy floor coating repair and renovation tips for existing floors.